

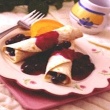


Recipe(tried): Pumpkin Head Cake (using cake mix)
Misc.ADVERTISEMENT
Do you have 1 or 2 bundt pans, a soup can and some packaged cake and icing in the pantry? Well, with this recipe, that's all you'll need! I've had rave reviews over this one at Halloween time!! Try it. The directions may look long, but it's only because I've included lots of detail so your first will be a success.HALLOWEEN PUMPKIN HEAD CAKE:
Ingredients:
2 boxes of cake mix (your choice of flavour)
ingredients that are outlined on your cake packages
2 - 3 cans of white icing (already prepared)
brown food coloring paste
orange food coloring paste
green leaf food coloring paste
2 dark chocolate bars (milk choc. will also do)
almond paste (check the xmas section of your bakery or supermarket)
Other Supplies:
1 or 2 bundt pans (these already have the grooves right in the pan)
1 empty small soup can (the top lid removed)
a lazy susan or high cake platter to use for ease in decorating....
vegetable cooking spray (such as pam, etc.)
Directions:
1.According cake package directions, prepare batter for one cake, if you only
have one bundt pan, (remember...you'll need to make a second cake later in the day) or the batter for two cake mixes if you have two of the pans. . Do not substitute a tube pan as you need the curve and grooves the bundt pan gives to the cake. RESERVE enough batter to be baked in the empty soup can.
2. Spray the bundt pans carefully with the vegetable spray ie. pam., etc. and Bake according to time and oven temperature as per cake box directions. Let cakes cool on wire racks. Spray the soup can and pour in cake batter 2/3 full. Bake this small cake for 15 minutes or so.
3. With a sharp knife, cut the bottom (ie. curved part) off the first cake so that this becomes the bottom of the pumpkin head. This will ensure the head doesn't go rolling off the cake platter!!! We'll call this your HEAD BASE. Lay this onto your cake platter or lazy susan and get ready to decorate!
4. Next, take your 2 cans of icing and tint it with orange food coloring paste until it becomes a pumpkin orange color (do not use liquid food color as you cannot get the deep orange color needed with it) RESERVE some icing to make a brown color for the stem of the pumpkin head (the soup can cake)
5. Following #4 step, ice the top of your HEAD BASE cake with a thick layer of the orange icing. Next, take the second bundt cake and lay it upside down on top of the HEAD BASE cake.....Now it should start looking like a pumpkin head!
DO NOT cut any part of this cake....You're doing great! Easy eh!
6. Next, with a 1 inch long metal spatula or you can use something similar, start placing the orange icing onto the entire cake, going in vertical (up and down) strokes to follow the groove marks of the bundt pans. A little extra icing may be needed where the two bundt cakes join in the centre to give that "whole" look
7. When finished icing the head, use a smaller knife to ensure the orange icing is deep into the grooves of the top of the cake and looking smooth in appearance.
8. Next take your soup can cake and cut in half or to a size that you would like for your stem. Next take your brown tinted icing and ice the sides and top of it.
Then place it at an angle so it sits into the top of the cake where the grooves come together. Smooth out fork marks in your icing.
9. There...the head is done..Now chill it while you're doing the next step.....
10. Lastly, take your chocolate bars and laying them onto waxed paper, microwave them until slightly soft...about 15 sec. or so. Then starting at a corner, cut a triangle of chocolate (cut a v-shape) . This will be its eye. Repeat and cut more v-shapes for his second eye and nose. Place and press into place on your pumpkin head cake. They will look like triangles. Continue and cut another 5 or 6 v-shapes for the mouth. Place these on the pumpkin head to form a smile, smallest points of chocolate v-shapes upwards to make his mouth.... These will look like upside down triangles. There....he looks fabulous....Now just one more step!
11. Tint your almond paste (room temp.) with green leaf paste food color and knead into it until uniform in color. Next roll almond paste out and with a sharp knife, with free hand, cut out three leaf shapes, about 3 inches or so. They don't have to be fancy... Cut stem lines into leaves. These leaves can all be different sizes too. Place these near the base of the soup can cake (the stem part of the cake.There You've done it!!!! He looks fabulous eh!
Now sit back, and wait for all those oooohs and aaaaaahs! They'll think a professional cake decorator did the job!!
- Post Reply
- Post New
- Save to Recipe Box
ADVERTISEMENT
UPLOAD AN IMAGE
Allowed file types: .gif .png .jpg .jpeg
Allowed file types: .gif .png .jpg .jpeg
POST A REPLY
Post a Request - Answer a Question
Share a Recipe
Thank You To All Who Contribute
Post a Request - Answer a Question
Share a Recipe
Thank You To All Who Contribute
- Do not use the message boards for advertising or solicitation of our visitors.
- Do not post personal data about yourself or others such as resumes, phone numbers, addresses, etc.
- Be kind. Rude or offensive posts are not acceptable. If you should find a posting that is objectionable to you please do not post a response. E-mail a message to: help@recipelink.com If a complaint is made against a message it is removed.
- Choose the board topic that best suits your post. Off topic messages may be moved or removed. Posts of the same request to more than one message board will be deleted.
- Please do not request that responses be e-mailed directly to you - we work together as a group and we all want to enjoy the replies!
- Please keep posting of URLs to a minimum and limited to exact responses to requests. Posts with links included are removed if they are inaccurate, if they don't lead to the exact answer to the request or if the site content doesn't meet our criteria for sites we link to.
- E-mail all site-related questions and comments to:help@recipelink.com
-
 The message
boards are monitored and not all posts are accepted. We reserve the right to
modify, move, use or remove (or not remove) information posted at our discretion
and without prior notification or explanation. Failure to follow the guidelines
may result in loss of access. These guidelines are subject to change without
notice.
The message
boards are monitored and not all posts are accepted. We reserve the right to
modify, move, use or remove (or not remove) information posted at our discretion
and without prior notification or explanation. Failure to follow the guidelines
may result in loss of access. These guidelines are subject to change without
notice.
 Not required, but a request:
Please take a moment to post a thank you to those that take the time (sometimes hours) to find the recipe or information you requested!
Not required, but a request:
Please take a moment to post a thank you to those that take the time (sometimes hours) to find the recipe or information you requested!
Thank you for participating!
POST A NEW MESSAGE
Post a Request - Answer a Question
Share a Recipe
Thank You To All Who Contribute
Post a Request - Answer a Question
Share a Recipe
Thank You To All Who Contribute
- Do not use the message boards for advertising or solicitation of our visitors.
- Do not post personal data about yourself or others such as resumes, phone numbers, addresses, etc.
- Be kind. Rude or offensive posts are not acceptable. If you should find a posting that is objectionable to you please do not post a response. E-mail a message to: help@recipelink.com If a complaint is made against a message it is removed.
- Choose the board topic that best suits your post. Off topic messages may be moved or removed. Posts of the same request to more than one message board will be deleted.
- Please do not request that responses be e-mailed directly to you - we work together as a group and we all want to enjoy the replies!
- Please keep posting of URLs to a minimum and limited to exact responses to requests. Posts with links included are removed if they are inaccurate, if they don't lead to the exact answer to the request or if the site content doesn't meet our criteria for sites we link to.
- E-mail all site-related questions and comments to:help@recipelink.com
-
The message
boards are monitored and not all posts are accepted. We reserve the right to
modify, move, use or remove (or not remove) information posted at our discretion
and without prior notification or explanation. Failure to follow the guidelines
may result in loss of access. These guidelines are subject to change without
notice.
Not required, but a request:
Please take a moment to post a thank you to those that take the time (sometimes hours) to find the recipe or information you requested!
Thank you for participating!