


Recipe: Pit Cooking Information - Jenny: Congratulations on your enterprise. The resulting turkey will
Main Dishes - Chicken, PoultryJenny: Congratulations on your enterprise. The resulting turkey will be worth it. Here is the best post about the subject that I found on the Internet.
Pit Cooking
Source of the information: Derrick Riches
http://bbq.about.com/od/barbecuehelp/a/aa061006a.htm
How to cook in a hole in the ground:
It's one of the oldest methods of cooking. Dig a hole in the ground, fill it with fire, add a large animal, cover, and cook. Most people recognize it as the Hawaiian Luau or more accurately Kalua Pig. While lots of people do this in many different ways there are a few basic steps you can take to make it turn out right. You can use this cooking method for large hogs, whole lamb, a side of beef, or virtually anything else you have that just isn't going to fit anywhere else.
Digging the Pit: The size of the hole in the ground you need is determined by what you are going to cook. The pit needs to be about one foot larger in every direction. If you have a pig that is four by two feet roughly then you need a hole six by four feet. The hole should be about three feet deep. The size of the hole is going to determine the size of the fire and how much of everything else you are going to need, so you need the hole first.
Lining the Pit: Most pits are lined in stones of bricks. This is done to even out and hold in the heat. Large stones, about the size of your head are perfect. One rule though is to avoid stones that have been in salt water (like the ocean) in geologic time (say the past few million years). These stones have a tendency to crack, break, and sometimes down right explode. If you plan on doing this a lot lining the pit with bricks is a good idea.
Building the Fire: You are going to need a lot of hot coals to do your pit cooking. Traditionally you would fill the pit with logs and burn them down to coals. This process can take the better part of a day. Some people choose charcoal but you are going to need a lot and since the fire isn't going to produce much smoke to flavor the meat you can go with the cheapest solution. What you are going to aim for is about a foot deep of burning hot coals before you start the actual cooking.
Wrapping the Meat: Whatever it is you choose to cook needs to first be flavored and then wrapped. Some people will stay that if you are doing a large animal you should place hot rocks in the body cavity. It's up to you, but I haven't found it necessary. What you do need is a secure package to put in the fire. This means tying up the meat firmly. Some people use chicken wire to wrap it together. This makes a good tight package. In the old days an important part of this wrapping was banana leaves (or other large leaves). This provided protection from the fire and moisture to the meat. These days' burlap bags are used to make a damp surface and aluminum foil is used to separate the meat from the coals. You use what you can get.
The basic wrapping instructions are to take the seasoned and prepared meat. Wrap tightly in many layers of foil then wrap that in lots of wet burlap. Finally you want to wrap that in a heavy wire frame. This holds the whole thing together and gives you something to hold on to. Once you have it wrapped tightly you are ready for the fire. One tip, if you are doing a whole hog you need the mouth propped open to let heat through. This is why the apple was put in the pig's mouth.
Loading the Pit: With the help of several strong people and possibly a few 2 x 4's you can now lower the meat into the pit. As soon as the meat is in the pit you need to cover it up. This keeps the burlap from burning by starving the fire of oxygen. The coals will remain hot for days, but you won't have an actual fire anymore. This can be done by covering the pit in dirt, but then you'll have to dig it all out later. You can use a large sheet of metal, but what you need to do is cut off the air from getting into the pit. Otherwise the burlap and then the meat will burn. By covering the pit you maintain a constant temperature that is perfect for cooking.
Cooking Time: This is going to take a while. If you have a very large hog with loads of vegetables (yes you can add these in to the pit too using the same method) you could be looking at the better part of two days. Generally though, the cooking time is going to be around 12 hours. The size of the pit dictated the size of the fire and therefore the amount of heat in the pit. This controls the cooking time. If you built the right size fire you should have about the same amount of time, no matter how much meat you have in the pit. Traditionally the meat goes in the fire at night for eating the next day. Since the meat is tightly wrapped it won't dry out and can tolerate a little overcooking so you have a large window to work with.
____________________________________________________
METHOD #1 by Steve Drake
This recipe comes from a fellow sand enthusiast with 10 years experience:
"I stuff my bird with quartered onions and butter. Then cover the whole bird in butter, drop it into a paper grocery bag, mash it tight and wrap it with about 5 layers of foil. Wrap some wire around it for a handle.
Dig hol":
Burn a lot of wood, when the coals are almost ready drop on a 20lb bag of charcoal and stir it up. By the time you walk over to get your bird the coals will now be ready.
Move some coals around and place the bird in the middle. Use the rest of the coals to cover the bird. Bury the whole thing with about 2ft of sand.
Cook time is between 5 to 6 hours.
________________________________________________________
METHOD #2 by Brian Trapp
Stuff the bird, place in roasting bag, then wrap with 3 layers aluminum foil.
Hole is dug and there is at least 50 lb. of really white hot charcoal.
Layer bottom of hole about 4" deep in charcoal, lay bird directly on that. Then completely cover the bird with the rest of the charcoal (sometimes I use short pieces of boards to sorta make a "frame" so I don't waste the charcoal).
When completely covered in charcoal, completely cover that in sand.
Come back in 6 hours and carefully dig it out.
Turkey will be soooo tender and juicy that you won't even need a knife to carve it!
____________________________________________________
METHOD #3 by Terry Tomlinson
Wrap the turkey in cheese clothe(I have never stuffed it)
wrap it in 3 layers of aluminum foil
soak a burlap sack in water
dig a hole 4' deep x3' dia.
Put 1 layer of med. sized rocks in the bottom
start the fire @ sunset
@ 11:30 place wrapped turkey in burlap sack and tie safety wire to it (3')
let the fire burn down to coals and place turkey in @ midnight
cover turkey with some coals and sand leaving the safety wire above the ground
dig the turkey up between noon and 1:00pm
(last year we did 2 turkeys)
Variation by Bob Tenwick:
use clean white sheets instead of cheese cloth, don't use aluminum foil, and soak the burlap in cheap red wine. I don't know if any of these things make a difference though. Last year we used too many rocks in the pit and too much fuel. Turkey was good just a hair on the dry side, still better than an oven turkey though.
We also used a remote thermometer. Just plug the probe in the breast and mark the other end of the wire in the sand with a flag or something. To check the bird just plug in the unit to the wire end.
MsgID: 0078303
Shared by: Gladys/PR
In reply to: ISO: turkey pit cooking
Board: Cooking Club at Recipelink.com
Shared by: Gladys/PR
In reply to: ISO: turkey pit cooking
Board: Cooking Club at Recipelink.com
- Read Replies (1)
- Post Reply
- Post New
- Save to Recipe Box
| Reviews and Replies: | |
| 1 | ISO: turkey pit cooking |
| jenny chino valley a.z | |
| 2 | Recipe: Pit Cooking Information - Jenny: Congratulations on your enterprise. The resulting turkey will |
| Gladys/PR | |
ADVERTISEMENT
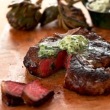
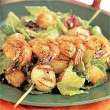
Random Recipes from:
Main Dishes - Chicken, Poultry
Main Dishes - Chicken, Poultry
- Company Chicken Casserole (using noodles and cottage cheese, crock pot)
- Easy Apricot Chicken (Using apricot jam and onion soup mix)
- Curry Chicken Lime Rice Bowls (using cooked rice, cooked chicken and mango chutne
- Catalan Grilled Chicken Leg Quarters with Sofrito
- Spicy Buttermilk Oven Fried Chicken (pre-fried then baked)
- Emeril Lagasse's Brown Sugar Barbecued Chicken
- Tea-Basted Roasted Chicken
- Pineapple Teriyaki Chicken with Rice
- Blue Ginger Chicken Chow Mein My Way (Ming Tsai)
- Cayenne-Rubbed Chicken with Avocado Salsa
UPLOAD AN IMAGE
Allowed file types: .gif .png .jpg .jpeg
Allowed file types: .gif .png .jpg .jpeg
POST A REPLY
Post a Request - Answer a Question
Share a Recipe
Thank You To All Who Contribute
Post a Request - Answer a Question
Share a Recipe
Thank You To All Who Contribute
- Do not use the message boards for advertising or solicitation of our visitors.
- Do not post personal data about yourself or others such as resumes, phone numbers, addresses, etc.
- Be kind. Rude or offensive posts are not acceptable. If you should find a posting that is objectionable to you please do not post a response. E-mail a message to: help@recipelink.com If a complaint is made against a message it is removed.
- Choose the board topic that best suits your post. Off topic messages may be moved or removed. Posts of the same request to more than one message board will be deleted.
- Please do not request that responses be e-mailed directly to you - we work together as a group and we all want to enjoy the replies!
- Please keep posting of URLs to a minimum and limited to exact responses to requests. Posts with links included are removed if they are inaccurate, if they don't lead to the exact answer to the request or if the site content doesn't meet our criteria for sites we link to.
- E-mail all site-related questions and comments to:help@recipelink.com
-
 The message
boards are monitored and not all posts are accepted. We reserve the right to
modify, move, use or remove (or not remove) information posted at our discretion
and without prior notification or explanation. Failure to follow the guidelines
may result in loss of access. These guidelines are subject to change without
notice.
The message
boards are monitored and not all posts are accepted. We reserve the right to
modify, move, use or remove (or not remove) information posted at our discretion
and without prior notification or explanation. Failure to follow the guidelines
may result in loss of access. These guidelines are subject to change without
notice.
 Not required, but a request:
Please take a moment to post a thank you to those that take the time (sometimes hours) to find the recipe or information you requested!
Not required, but a request:
Please take a moment to post a thank you to those that take the time (sometimes hours) to find the recipe or information you requested!
Thank you for participating!
POST A NEW MESSAGE
Post a Request - Answer a Question
Share a Recipe
Thank You To All Who Contribute
Post a Request - Answer a Question
Share a Recipe
Thank You To All Who Contribute
- Do not use the message boards for advertising or solicitation of our visitors.
- Do not post personal data about yourself or others such as resumes, phone numbers, addresses, etc.
- Be kind. Rude or offensive posts are not acceptable. If you should find a posting that is objectionable to you please do not post a response. E-mail a message to: help@recipelink.com If a complaint is made against a message it is removed.
- Choose the board topic that best suits your post. Off topic messages may be moved or removed. Posts of the same request to more than one message board will be deleted.
- Please do not request that responses be e-mailed directly to you - we work together as a group and we all want to enjoy the replies!
- Please keep posting of URLs to a minimum and limited to exact responses to requests. Posts with links included are removed if they are inaccurate, if they don't lead to the exact answer to the request or if the site content doesn't meet our criteria for sites we link to.
- E-mail all site-related questions and comments to:help@recipelink.com
-
The message
boards are monitored and not all posts are accepted. We reserve the right to
modify, move, use or remove (or not remove) information posted at our discretion
and without prior notification or explanation. Failure to follow the guidelines
may result in loss of access. These guidelines are subject to change without
notice.
Not required, but a request:
Please take a moment to post a thank you to those that take the time (sometimes hours) to find the recipe or information you requested!
Thank you for participating!