The Recipe Link
Cooking on the net since 1996!
Recipelink.com
- Real Recipes from Real People -
-
 Ham...
 Doughmakers Ham and Dill Scone...
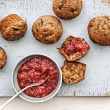 Mini Zucchini Banana Muffins w...
 Quinoa...
 Greek Pasta Salad with Cucumbe...
 Poppy Seed Filled Challah...
 Yellow Pepper Quinoa with Home...
 Confetti Cookies in a Jar...
 Blueberry Cake Rolls...
 48 Recipes from the Booklet: M...
 Triple-Smoky Macaroni and Chee...
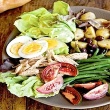 Classic Salad Nicoise...
 Carrot Cumin Firecrackers (GF)...
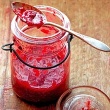 Lemon-Kissed Strawberry Jam (m...
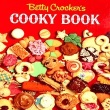 Mary's and Ethel's Sugar Cooki...
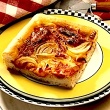 Deep Dish Ham and Onion Pizza...
 Magnolia Bakery Chocolate Cupc...
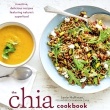 Chia Green Superfood Smoothies...
 Sarah Wilson's Raspberry Rippl...
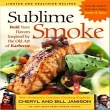 Brandy-Smoked Turkey Breast...
 Sausage...
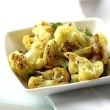 Spicy Indian Cauliflower...
 Moroccan Quinoa...
 Homemade Animal Crackers...
 Lidia's Skillet Gratin of Mush...
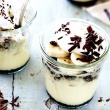 Chocolate-Banana Cheesecake in...
 Fruitcake in a Mug (using cake...
 Spicy Chicken...
 Cottage Berry Whip (using cott...
 Baked Eggs with Spinach...
 Burger Bar Blue Cheese Stuffed...
 Cauliflower and Chickpea Curry...
 Spinach Artichoke Focaccia...
 Buffalo Horns (using chicken a...
 Chicken...
 Chard and Cilantro Soup with N...
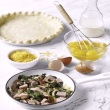 Never Fail Ham and Spinach Qui...
 Spinach...
 Homemade Oat Milk (substitute ...
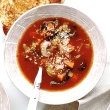 Mushroom and Rainbow Chard Min...
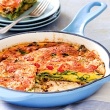 Layered Frittata with Leeks...
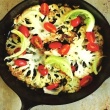 Pan-Roasted Cauliflower Steaks...
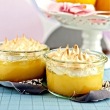 Lemon Meringue Pies in Jars wi...
 15 Minute Olive Oil and Sesame...
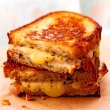 Grilled Ham and Cheese Sandwic...
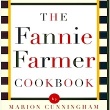 Fannie Farmer Chicken Pot Pie...
 Lemony Chard-Stuffed Shells...
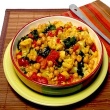 Cauliflower and Chickpea Curry...
 Strawberry Chia Smoothie...
 Strata Frittata (Baked Eggs wi...
 Homemade Creamy Dreamy Almond ...
 Fresh Berry Scones with Vanill...
 Party Potato Salad...
 37 Recipes from the Booklet: P...
 Mini Apple Pies...
 26 Recipes from the Booklet: T...
Ham...
26 Recipes from the Booklet: T...
Ham... Curried Cauliflower with Scall...
 Overnight Salmon Bake...
 Swiss Chard Gratin (serves 2)...
 Blue Hill One Ingredient Whole...
 Tomato...
 8 Recipes from the Booklet: Ba...
 Mayonnaise for Days and Aioli ...
 Turkey Meatballs with Carrots ...